前言
近期服务器不太稳定,于是需要找一些工具检测服务器状态,避免服务挂掉。这里介绍一些服务器检测工具 Monit 的使用。
安装
在 Monit官网 下载安装包,我这里推荐服务器是 CentOS 7,选择 linux-x64 版本。可以在服务器直接下载,我这里本地电脑下载好以后使用 Transmit 传到服务器。
在服务器中我放在了 /data 路径下,因为关于推荐的文件都放在这里,把监控服务放这里比较好管理。解压文件:
1 | tar -zvxf monit-5.25.2-linux-x64.tar.gz |
这时候就可以使用了。
配置
配置 monitrc
首先要配置 monit/conf/monitrc 文件,修改成以下内容,注意这里没有配置邮件发送服务,因为邮件发送需要配置 SMTP Server,暂时不需要就没配置了。
1 | ############################################################################### |
配置监控进程
详细的配置方法在 Monit 的手册 配置方法 里面可以找到,这里有两个例子:
monit/conf/sys/mount.conf如果系统中没有挂载
/dev/sdb,那就执行挂载命令。1
2
3# mount.conf
check filesystem data with path /dev/sdb
if does not exist then exec "/bin/mount /dev/sdb /data"monit/conf/sys/recommender.conf如果没有名为
python server.py的进程,那就启动。1
2
3
4# recommender.conf
check process recommender with MATCHING "python server.py"
if does not exist then exec "/usr/bin/nohup python /data/Recommender/src_tornado/server/server.py &"
if changed pid then alert
启动和关闭
这里有几个常用的脚本,放在 Monit 根目录下,即和 bin 同级的目录,注意这里的文件需要使用 chmod 赋予运行权限。
start.sh(启动)
1 | pwd=$(cd `dirname $0`; pwd) |
stop.sh(关闭)
1 | #bin/monit -c /data/server/monit/conf/monitrc quit |
restart.sh(重启)
1 | kill -9 `ps -ef | grep monit/bin/monit | grep -v "grep" | awk '{print $2}' ` |
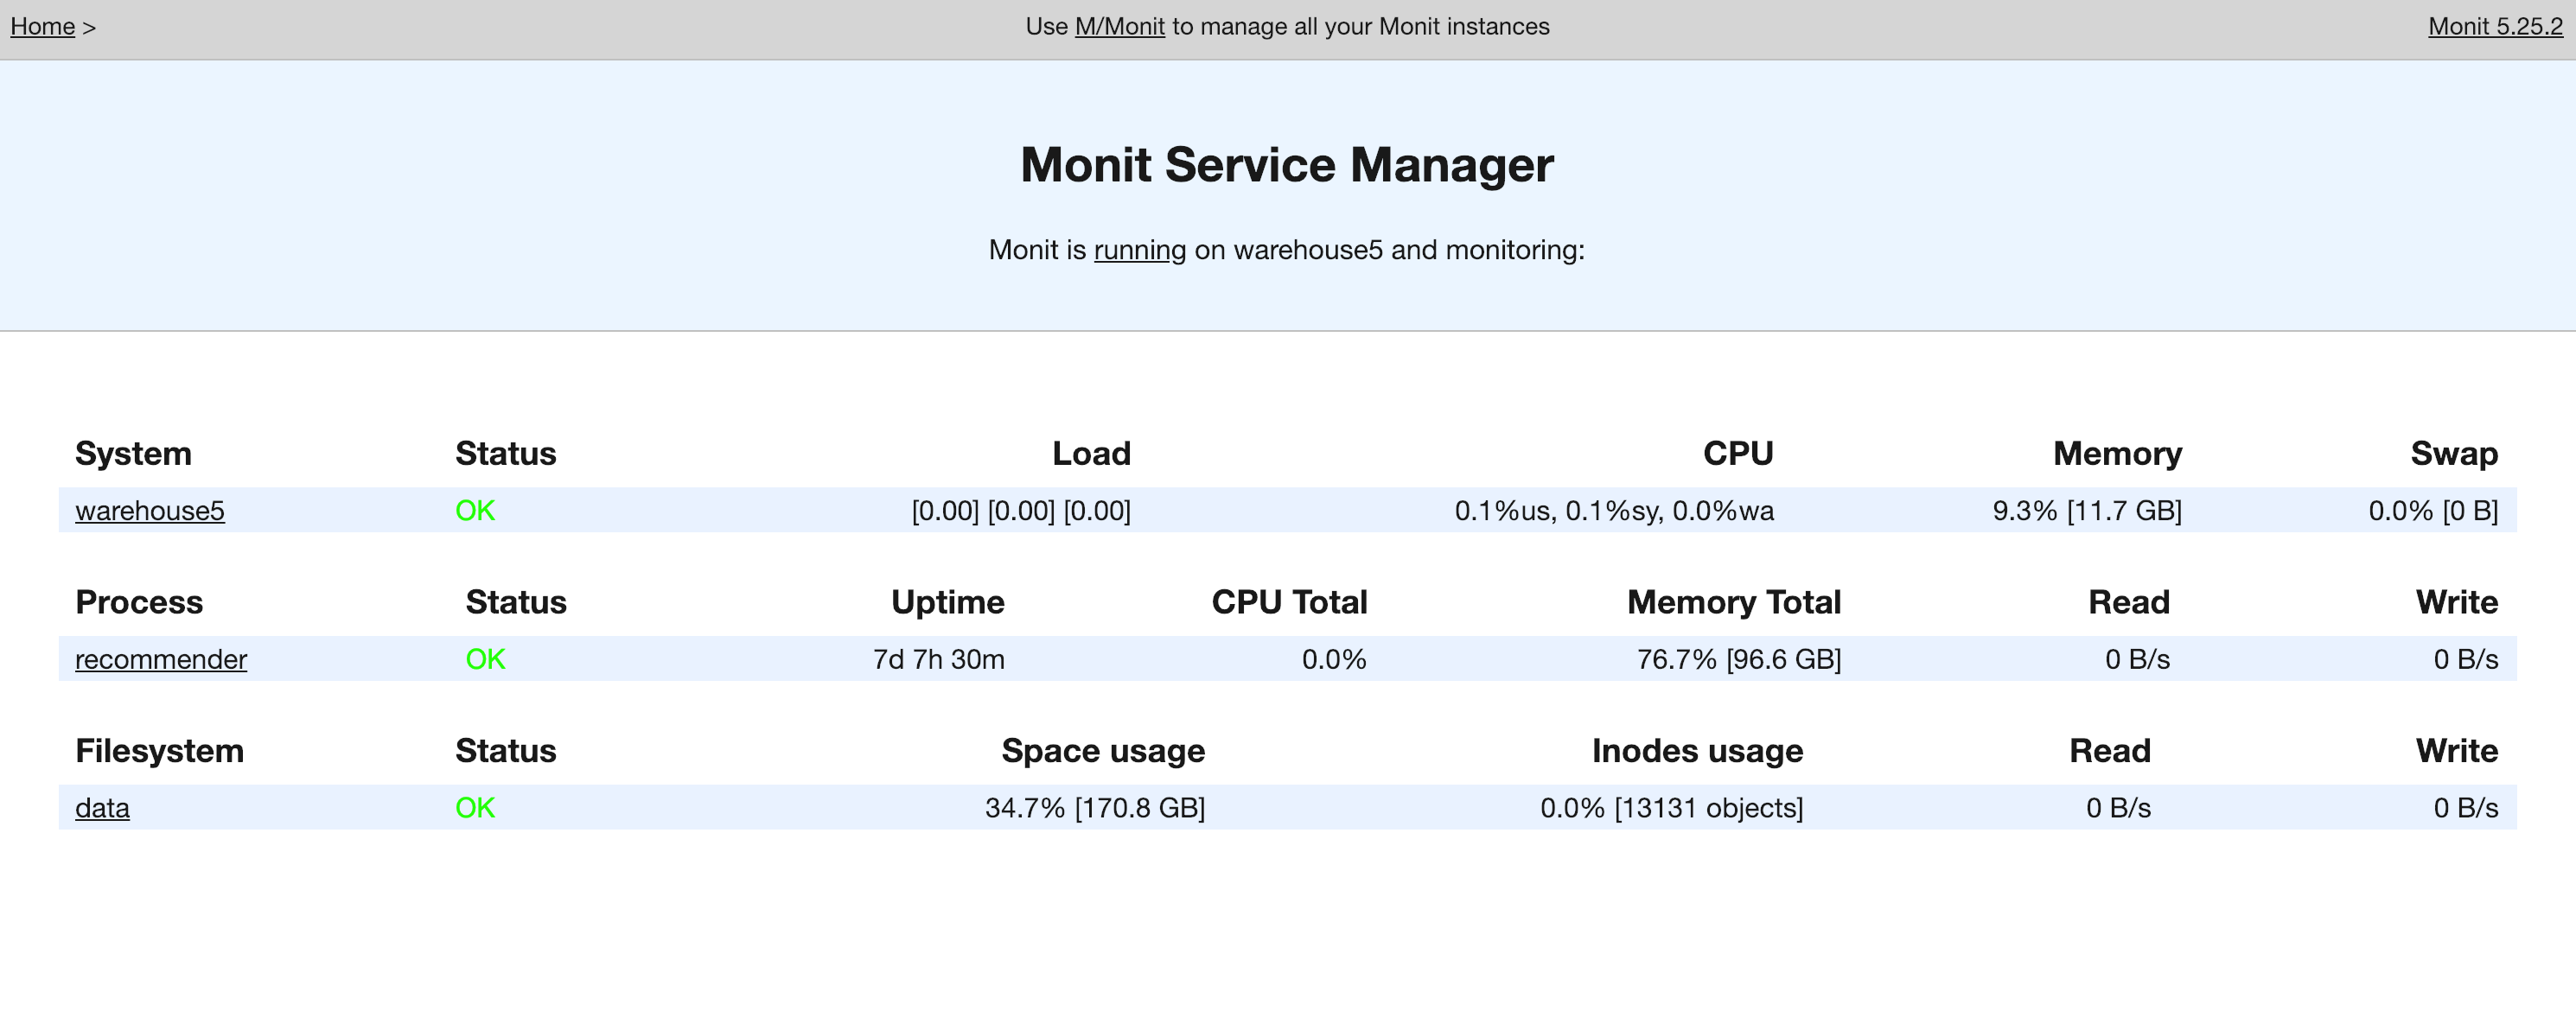
监控界面
启动以后就可以通过浏览器访问了,我这里配置了 http://localhost:1235/ 就是目标服务器的 2812 端口。通过浏览器访问:
总结
这里仅提到了 Monit 的基础使用,进阶使用还需研究官方文档。